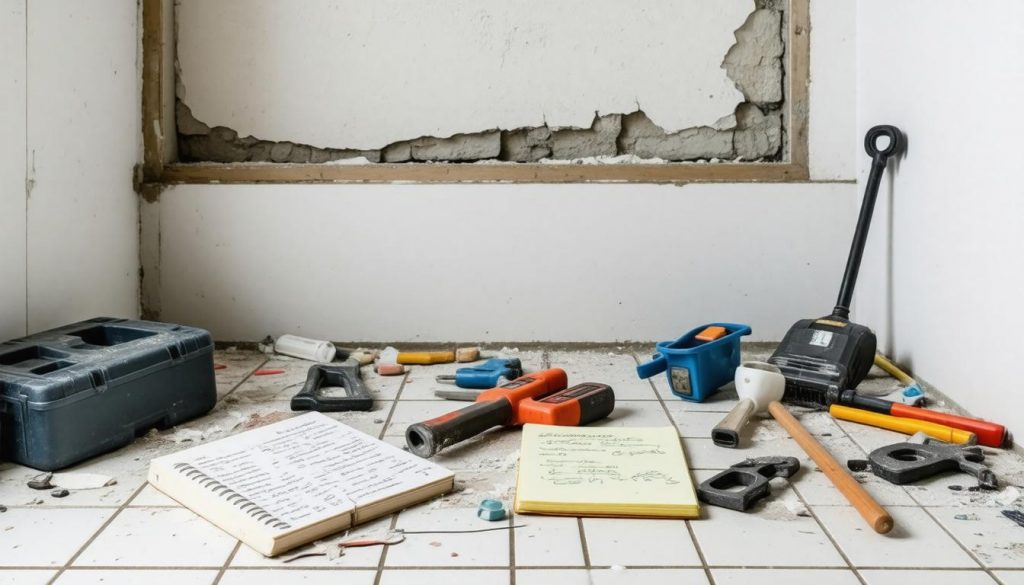
Remodeling a bathroom can feel exciting: fresh tiles, new fixtures, a whole new vibe. But without careful planning, these projects often turn into costly headaches filled with unexpected surprises. Many homeowners dive in with big ideas but stumble over common mistakes that slow progress, stretch budgets, and leave them less happy with the final result. Knowing what to watch out for from the start helps you avoid those missteps and makes your renovation smoother and more satisfying. Let’s walk through the ten biggest bathroom remodeling mistakes and how to steer clear of them.
The 10 biggest bathroom remodeling mistakes to avoid include choosing moisture-sensitive materials like wood floors, neglecting proper ventilation which leads to mold, poor fixture spacing that compromises comfort, inadequate or poorly planned storage solutions, overlooking door functionality in small spaces, attempting DIY plumbing without professional expertise, selecting trendy fixtures that may lose appeal or cause maintenance issues, insufficient lighting especially around mirrors, purchasing materials before finalizing the design plan causing mismatches, and failing to budget accurately resulting in unexpected costs. Avoiding these errors ensures a durable, functional, and aesthetically pleasing bathroom remodel.
Lack of Proper Planning
One major reason remodeling projects run over budget and schedule is failing to define the project scope clearly from the outset. Without a comprehensive list of what you want to change (whether that’s swapping out fixtures, rearranging the layout, or choosing materials), you risk making hasty decisions halfway through that throw off your budget or stall progress. Defining these elements early helps keep everything aligned with your needs and expectations.
Establishing a detailed budget is just as critical as identifying your project goals. Renovations often uncover surprises like outdated plumbing or electrical issues that must be addressed immediately. Industry experts recommend building in a contingency of around 20%, recognizing that unforeseen expenses are nearly guaranteed. This buffer isn’t just about higher costs; it offers peace of mind throughout the process, reducing stress when unexpected work inevitably arises.
Understanding Timeline Realities
Beyond finances, scheduling presents its own challenges that often get overlooked until they become pressing problems. For households relying on a single bathroom, the timing of demolition to completion can dramatically affect daily life. Planning for alternative arrangements during construction (whether booking a gym membership, using facilities at work, or setting up temporary bathroom solutions) helps reduce inconvenience and frustration.
Including realistic timeframes and factoring in possible delays upfront avoids surprises that could stretch your renovation from weeks into months. Most bathroom remodels take between 3-6 weeks for a standard renovation, but complex projects involving layout changes or structural work can extend to 8-12 weeks. Factor in permit approval times, which can range from 2-6 weeks depending on your municipality, material delivery delays that average 1-3 weeks for custom orders, and contractor availability when setting your expectations.
Leveraging Digital Planning Tools
Leveraging technology can also smooth the planning phase and prevent costly errors before work begins. Tools like RoomSketcher and MagicPlan enable you to visualize layouts and fixture placements within your actual space. By experimenting digitally first, you avoid purchasing incompatible materials or realizing mid-project that key elements don’t fit properly. These apps allow you to test different configurations, measure clearances accurately, and even share 3D renderings with contractors to ensure everyone understands the vision.
Here’s a practical example: Before committing to a double vanity, use these tools to verify you have the minimum 60 inches of wall space required, plus adequate clearance for drawers to open fully without hitting the toilet or shower door. This simple digital check can save you from ordering a $2,000 vanity that won’t physically fit your space.
| Planning Aspect | Common Pitfall | Pro Tip |
|---|---|---|
| Project Scope | Vague goals leading to scope creep | Write down every change desired in detail |
| Budget | Underestimating hidden costs | Add 20% contingency for surprises |
| Scheduling | Ignoring impact on daily routines | Plan temporary alternatives early |
| Design Visualization | Skipping digital mockups | Use apps to preview design and layout |
Thorough upfront planning saves time, money, and headaches by providing a clear roadmap to follow. It transforms a chaotic renovation into a controlled project delivered closer to your vision and your budget. At BathGems, we emphasize this step with our clients because experience has shown how pivotal it is for success in bathroom remodels of any size.
With solid plans established, attention naturally shifts toward making smart choices about materials and maintaining workflow efficiency alongside contractors, which are critical moves that greatly influence overall project success.
Ignoring Functional Needs
It’s surprisingly common for homeowners to fall into the trap of prioritizing style over substance when remodeling their bathrooms. You might envision sleek tiles, stylish fixtures, and an Instagram-worthy vanity but overlook critical practical elements that make everyday use comfortable and safe. A bathroom may dazzle visually yet quickly become frustrating if it lacks proper storage, ventilation, or accessibility features.
To avoid these pitfalls, you must start by prioritizing functional needs just as much as aesthetics. Think through how the space will be used every day. For instance, adequate storage is essential. Even a small powder room benefits greatly from thoughtfully integrated shelves or a vanity with drawers to keep toiletries and linens organized and within reach. Neglecting this often leads to clutter piling up on counters and floors, which defeats the purpose of a clean, remodeled space.
The Critical Role of Ventilation
Beyond storage, ventilation is another cornerstone of a well-functioning bathroom that many forget until problems arise. Proper ventilation isn’t just about comfort; it’s a health necessity. Moisture from showers and baths creates an ideal environment for mold and mildew growth, which can damage surfaces and compromise indoor air quality. An exhaust fan that vents directly outdoors is non-negotiable. Fans that simply recirculate air inside won’t do the job.
Modern humidity-sensing fans provide smart control by activating only when moisture levels rise, avoiding wasted energy and constant noise. According to the Home Ventilating Institute, bathroom exhaust fans should provide at least 1 CFM (cubic foot per minute) per square foot of bathroom space, with a minimum of 50 CFM for bathrooms under 50 square feet. For larger bathrooms or those with separate toilet compartments, increase this to 80-100 CFM to ensure adequate air exchange.
Here’s what proper ventilation prevents: A bathroom without adequate ventilation can develop visible mold within 24-48 hours after moisture exposure. Over time, this leads to peeling paint, warped cabinetry, damaged drywall, and potential respiratory issues for occupants. Installing a quality exhaust fan costs $200-600 but prevents thousands in future mold remediation and structural repairs.
Essential Functional Considerations
Other functional aspects deserve attention too:
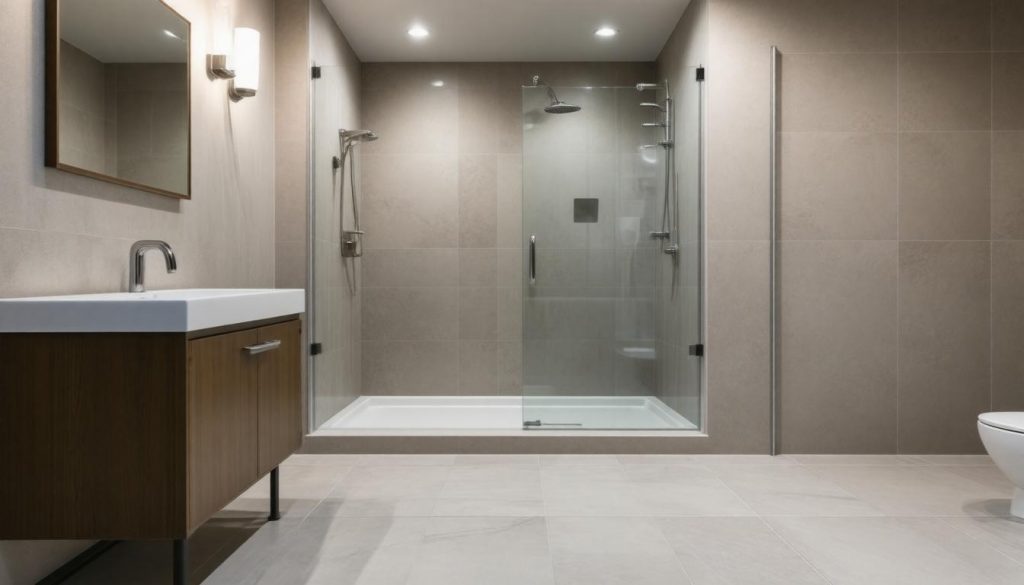
- Fixture spacing: Toilets need at least 15 inches clearance from each side for comfort, and roughly 24 inches in front to avoid feeling cramped. This prevents knee bumps and awkward positioning. Building codes actually require a minimum of 15 inches from the toilet centerline to any wall or fixture, but 18 inches provides noticeably better comfort for most users.
- Door operation: Standard doors opening inward aren’t always suitable in tight layouts where fixtures block swing space. Considering pocket or bi-fold doors can save precious square footage. A standard 32-inch door requires approximately 9 square feet of clearance when fully opened, space that could otherwise accommodate a larger vanity or additional storage.
- Flooring choice: Durable, moisture-resistant flooring like ceramic tile or engineered vinyl prevents water damage unlike hardwood or laminate, which swell or warp easily in humid conditions. Porcelain tile rated for wet areas offers a slip-resistance rating (measured as DCOF, or Dynamic Coefficient of Friction) of at least 0.42, which meets ADA safety standards for wet surfaces.
- Accessibility features: Even if not immediately needed, incorporating grab bars, curbless showers, or comfort-height toilets adds universal design elements that increase safety and future-proof your investment. Comfort-height toilets (17-19 inches tall versus the standard 15 inches) reduce strain on knees and hips, making them easier for aging adults, tall individuals, and those with mobility limitations.
Emphasizing these functional features upfront not only increases everyday comfort but can prevent costly repairs later on.
Here’s how functional factors influence renovation outcomes:
| Functional Feature | Impact of Ignoring | Benefit When Addressed |
|---|---|---|
| Storage | Cluttered counters and floors | Organized space; easier cleaning |
| Ventilation | Mold growth and poor air quality | Healthy environment; longevity |
| Fixture Spacing | Discomfort; reduced usability | Comfortable movement; ergonomic use |
| Door Functionality | Restricted access; awkward layout | Space optimization; smooth entry |
| Flooring Selection | Water damage; deterioration | Durable floor; low maintenance |
By integrating these considerations early in your bathroom remodel plan (before fixtures are selected or walls are painted), you edge closer to creating a space that offers lasting satisfaction both in form and function. This balance reflects not just smart design but thoughtful anticipation of your household’s unique lifestyle needs.
Next, consider how choosing the right materials plays a pivotal role in both the durability and aesthetic success of your renovation project. Making informed decisions here lays the groundwork for a bathroom that stands the test of time.
Choosing Poor Materials
The materials you select set the foundation for how well your bathroom will stand up to daily use and, just as important, how it ages over time. Many bathrooms that look worn out and tired after a short period owe their fate to materials that weren’t suited for the environment. Bathrooms are unique spaces with frequent moisture, temperature swings, and heavy foot traffic, so ignoring these factors can lead to costly problems like mold growth, peeling surfaces, or warped cabinetry.
Understanding Moisture-Resistant Materials
For instance, surfaces that aren’t moisture-resistant invite mold and mildew, which not only damage finishes but also pose health risks. Wood that isn’t properly sealed can absorb water, swell, and crack. Cheap laminates may bubble or peel with exposure to humidity. Keeping all this in mind means prioritizing materials designed to thrive in wet conditions.
Ceramic and porcelain tiles have long been champions in bathroom flooring and walls because of their durability and water resistance. Both handle splashes without complaint and clean easily, making them practical choices. Porcelain tiles are denser than ceramic (with water absorption rates below 0.5% compared to ceramic’s 3-7%), making them even more water-resistant and suitable for high-moisture areas. This density also makes porcelain more resistant to cracking from temperature fluctuations, an important consideration if your bathroom experiences significant seasonal temperature changes.
Quartz and granite countertops offer a luxurious yet hard-wearing surface resistant to stains and heat, which is perfect for vanities where moisture and grooming products abound. Quartz is engineered to be non-porous, meaning it never requires sealing and resists bacteria growth better than natural stone. Granite, while requiring periodic sealing (typically once per year), offers unique natural patterns that many homeowners prefer for aesthetic reasons.
| Material | Recommended For | Not Ideal For | Maintenance Level |
|---|---|---|---|
| Ceramic Tile | Floors, walls | Countertops (can chip under impact) | Low (periodic grout sealing) |
| Porcelain Tile | Floors, walls, shower surrounds | Countertops (higher cost) | Very Low |
| Quartz | Countertops, shower walls | Floors (can become slippery when wet) | Very Low (no sealing needed) |
| Granite | Countertops | High-moisture shower walls | Medium (annual sealing) |
| Vinyl | Floors | High-end aesthetic spaces | Low |
While vinyl flooring can work in small budgets or low-traffic bathrooms due to its water resistance and ease of installation, it falls short when aiming for that upscale bathroom vibe. However, luxury vinyl plank (LVP) has evolved significantly, with premium options featuring realistic wood or stone textures and enhanced durability ratings that make them suitable for mid-range renovations.
Balancing Aesthetics with Durability
On the other hand, stone surfaces (especially large slabs) are making a triumphant return in luxury remodels by wrapping floors, walls, and even vanities into cohesive statements of elegance. But they demand professional installation and regular sealing to maintain their beauty and prevent staining. Natural marble, for example, is calcium-based and vulnerable to etching from acidic substances like toothpaste, perfume, or cleaning products. If you love the marble aesthetic but want lower maintenance, consider porcelain tiles that mimic marble’s veining, offering the look without the upkeep.
Balancing durability with aesthetics is key here. You don’t want your bathroom to be purely utilitarian; it should reflect your style while enduring years of use. Sometimes mixing materials (like combining natural stone countertops with porcelain tile flooring) creates drama and interest without sacrificing function.
Furthermore, consider the rise of architectural elements like carved stone sinks or integrated vanities. These features add character but rely on quality material craftsmanship to hold up over time, which is a stark contrast to mass-produced alternatives prone to chipping or discoloration.
Maintenance Considerations
Beyond just looks, think about maintenance too. Smooth quartz surfaces resist stains and bacteria better than porous stones like marble unless heavily sealed. Tiles with textured finishes provide safety underfoot but might trap soap scum more readily. Your choice affects cleaning frequency and effort.
Consider the long-term cost of ownership when selecting materials. While natural stone may have a higher upfront cost ($75-200 per square foot installed), its longevity and timeless appeal can make it more cost-effective over a 20-year period compared to cheaper alternatives that need replacement every 5-7 years. Calculate the total cost over your expected time in the home: a $3,000 porcelain tile floor that lasts 25+ years costs less annually than a $1,500 vinyl floor replaced every 7 years.
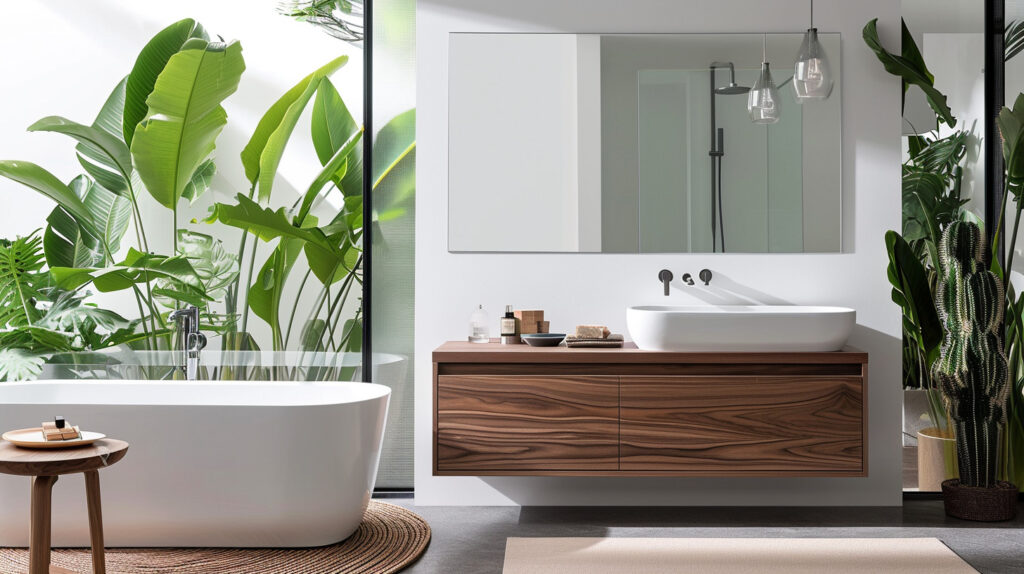
Finally, emerging 2026 trends emphasize a pivot away from freestanding tubs toward drop-in or undermount bathtubs because they blend function and luxury seamlessly when paired with durable surrounds such as stone or porcelain tile decks. These installations create a cohesive, spa-like aesthetic while being easier to clean and maintain than freestanding models with exposed plumbing.
Selecting the right materials is more than an aesthetic choice. It directly impacts longevity and comfort in your bathroom space. With this understanding of quality foundations laid out, we now turn to how optimizing the organization of your space can transform functionality and flow.
Inefficient Space Use
Inefficient use of space can turn even a generously sized bathroom into a cramped, frustrating experience. When designing your renovation, efficient space use is more than just fitting fixtures. It’s about placing them thoughtfully and identifying overlooked areas that can serve multiple purposes. A common pitfall occurs when toilets or sinks are jammed too close to walls or each other, leaving barely enough room to move comfortably. Even a few inches of clearance can make the difference between a functional bathroom and one that feels like a treadmill you never signed up for.
Strategic Fixture Placement
Efficient space use means understanding your bathroom’s unique shape and flow. It demands thinking beyond the obvious spots for fixtures and instead using corners or underutilized nooks effectively. For instance, corner sinks or vanities free up central floor space, fostering an open and inviting atmosphere. Wall-mounted toilets offer a similar advantage by lifting bulky bases off the floor, creating visual openness and simplifying floor cleaning. These solutions are especially valuable in smaller bathrooms where every inch counts.
The key is adhering to minimum clearance standards without sacrificing storage or style. At least 15 inches from the toilet center to any adjacent wall or fixture ensures comfortable use. Meanwhile, aisles in front of sinks should allow for at least 21 inches of clearance, with toilets requiring about 24 inches in front. This isn’t just rule-following; it’s about preventing the all-too-common frustration of ‘knee-bumping’ and awkward maneuvering that plague poorly planned bathrooms.
When planning a double vanity installation, proper spacing becomes even more critical. Each sink needs adequate elbow room to prevent users from bumping into each other during morning routines. For detailed guidance on double sink bathroom vanity spacing rules and measurements, including how to calculate the ideal distance between sinks based on your bathroom dimensions, refer to our comprehensive spacing guide. Getting these measurements right from the start prevents the costly mistake of ordering a vanity that creates a cramped, uncomfortable experience.
| Fixture | Minimum Clearance Required | Comfortable Clearance | Why it Matters |
|---|---|---|---|
| Toilet | 15″ side clearance / 24″ front | 18″ side / 30″ front | Comfort and ease of use; prevents feeling cramped |
| Sink | 21″ aisle width | 30″ aisle width | Allows functional workspace and comfortable movement |
| Shower/Bathtub | 30″ aisle width | 36″ aisle width | Safe entry and exit; towel-drying space |
| Double Vanity | 30″ between sink centers | 36″ between sink centers | Prevents elbow bumping; comfortable simultaneous use |
Maximizing Storage Solutions
Storage solutions also play directly into space efficiency. Designers and homeowners often underestimate the value of ample linen cabinets, medicine cabinets, or shelves above toilets, especially in powder rooms. Without designated storage, surfaces clutter easily, making the room feel chaotic and even smaller than it actually is.
Prioritize integrated storage options. Vanities with drawers, recessed shelving inside shower walls, or slim vertical cabinets fit neatly into tight spaces while keeping essentials organized yet accessible. A good rule of thumb from industry experts is to allocate at least 20% of your total bathroom square footage to storage, avoiding clutter that overwhelms cramped layouts.
Consider these creative storage solutions that maximize every inch:
- Recessed niches: Built into shower walls during construction, these provide storage without protruding into the space. Standard niche dimensions of 14″ wide by 20″ tall fit between wall studs without requiring structural modifications, adding storage for approximately $150-300 in materials and labor.
- Toe-kick drawers: Utilize the space beneath vanities for flat items like bath mats or cleaning supplies. This often-wasted 4-inch space can accommodate shallow drawers that add 2-3 cubic feet of storage.
- Over-toilet cabinets: Vertical storage that capitalizes on often-wasted wall space. A well-designed over-toilet cabinet can add 6-10 cubic feet of storage without consuming any floor space.
- Medicine cabinets with outlets: Modern versions include interior electrical outlets for charging electric toothbrushes or razors, eliminating countertop cord clutter while providing 2-4 cubic feet of organized storage for daily essentials.
Door and Layout Optimization
Another clever trick involves door choices: standard inward-opening doors can gobble up precious space if not carefully planned around fixture placement. Substituting these with pocket doors or bi-fold alternatives reclaims several square feet, which is a seemingly small change with outsized impact on spatial comfort.
When planning your layout, consider the “work triangle” concept adapted for bathrooms. The path between the toilet, sink, and shower should be unobstructed and efficient, minimizing unnecessary steps while maintaining adequate clearance around each fixture. In a well-designed bathroom, you should be able to move from the shower to the vanity to the toilet without backtracking or navigating around obstacles.
With space optimized through thoughtful design and smart storage integration, attention naturally shifts to how lighting can transform your bathroom’s usability and ambiance. This crucial element often goes unnoticed but holds the power to elevate every renovation detail you’ve carefully laid out.
Overlooking Lighting Requirements
Good lighting in a bathroom is often underestimated, yet it serves as the backbone of both function and atmosphere. Imagine trying to shave or apply makeup under dim or harsh lighting. It’s frustrating because the wrong light can distort colors and shadows, leading to mistakes or discomfort.
Bathroom remodeling in 2026 leans heavily on balancing lighting that not only works well but also enhances the overall ambiance, turning what was once just a utility room into a sanctuary.
The Three Layers of Bathroom Lighting
When approaching lighting design, it helps to think about three essential layers: ambient, task, and accent lighting. Understanding how these layers work together transforms your bathroom from merely functional to genuinely enjoyable.
Ambient light casts a soft glow that fills the room evenly, often achieved through ceiling fixtures like recessed lights or elegant pendants. This general illumination sets the tone for your entire bathroom, so selecting fixtures with dimmable capabilities can be transformative. It allows you to shift from bright morning energy to a gentle evening mood without changing bulbs or lamps. For optimal ambient lighting, aim for 70-80 lumens per square foot in the bathroom. For a typical 50-square-foot bathroom, this translates to approximately 3,500-4,000 lumens total, which you might achieve with four 60-watt equivalent LED bulbs (800-900 lumens each) distributed across ceiling fixtures.
Task lighting is where precision matters most. This type zeroes in on activities requiring clear visibility, like brushing teeth or grooming. A popular solution today is LED strip lighting installed around mirrors, providing crisp, shadow-free illumination that’s easy on the eyes. The benefit here goes beyond functionality; good task lighting reduces eye strain dramatically. A study from the Lighting Research Center reports improvements by as much as 50%. That means less squinting and more confidence in your daily routine.
For vanity task lighting, position fixtures at eye level on both sides of the mirror rather than only above it. This eliminates unflattering shadows under the eyes and chin, providing even illumination across the face. Aim for 75-100 watts of incandescent equivalent (or 1,100-1,600 lumens) for vanity task lighting. Sconces placed 36-40 inches apart and 60-65 inches from the floor provide optimal face illumination for most users. If side lighting isn’t possible, a horizontal bar fixture mounted directly above the mirror at 75-80 inches from the floor offers the next best solution.
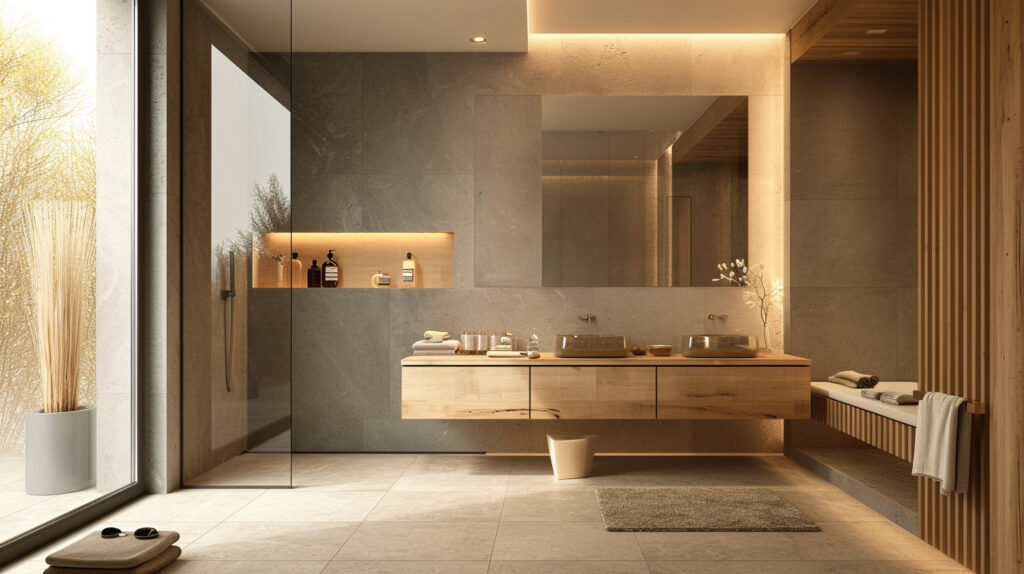
Accent lighting is perhaps the most creatively rewarding element. Accent lights highlight specific architectural features such as sculptural basins or textured tiles that create natural interplay with light and shadow. Adding hidden LED strips beneath vanities or directional spotlights on artwork turns everyday moments into immersive sensory experiences. In 2026’s bathroom designs, these subtle touches contribute to quiet luxury by rewarding thoughtful craftsmanship.
Accent lighting typically uses about 10-15% of your total lighting budget but delivers outsized impact on perceived luxury and ambiance. Consider these applications: LED strips under floating vanities create a “floating” effect while providing subtle nighttime navigation lighting; recessed spotlights aimed at textured stone walls create dramatic shadows that emphasize material quality; and small puck lights inside glass-front cabinets showcase decorative items while making contents easier to locate.
Smart Lighting Integration
Another vital consideration is how smart technology now integrates with modern lighting systems. Underfloor heating panels often coordinate with adaptive lights and ventilation controls via discreet touchscreens or apps. This seamless control means you can personalize your bathroom environment by adjusting brightness levels and color temperature throughout the day, which enhances wellness and comfort effortlessly.
Smart lighting systems can be programmed for different scenarios:
- Morning routine: Bright, cool-toned light (5000K-6500K) to energize and improve visibility for grooming tasks. This color temperature mimics natural daylight and has been shown to increase alertness and reduce grogginess.
- Evening relaxation: Warm, dimmed lighting (2700K-3000K) to promote calm before bedtime. Warmer color temperatures reduce blue light exposure, which can interfere with melatonin production and sleep quality.
- Night mode: Minimal pathway lighting (typically under 50 lumens) to avoid disrupting sleep cycles. Motion-activated night lights placed near the floor provide just enough illumination for safe nighttime navigation without the harsh brightness that fully wakes you.
Smart systems from manufacturers like Lutron, Philips Hue, or LIFX allow you to create and save these scenes, then activate them with voice commands, smartphone apps, or programmed schedules. The initial investment ($200-800 depending on system complexity) pays dividends in daily convenience and energy savings, as LED smart bulbs use 75-80% less energy than traditional incandescent bulbs.
Avoiding Common Lighting Mistakes
In planning your remodel, avoid falling into the trap of relying solely on overhead lights or cheap fluorescent bulbs that drain atmosphere and make spaces feel harsh or clinical. Instead, invest time in layering your lighting thoughtfully across these three categories. Evaluate natural light sources too; positioning mirrors strategically can amplify sunlight during the day while reducing glare.
One common mistake is installing a single overhead fixture and calling it done. This creates harsh shadows and unflattering light for grooming tasks. Another frequent error is choosing fixtures based solely on appearance without considering their light output, color temperature, or beam angle. A beautiful fixture that produces inadequate or poorly directed light fails its primary purpose.
Properly blending ambient, task, and accent lighting transforms your bathroom from a mere functional space into a living environment filled with texture, warmth, and sensory engagement, which is the hallmark of 2026 design trends inspired by nature’s own palette.
With this understanding of why lighting matters so deeply, selecting fixtures and controls that unite these elements will shape a renovation plan rich in both style and function. Next, attention must turn to managing the project efficiently to avoid costly setbacks and frustrations.
Poor Project Management
Bathroom remodeling is rarely a straightforward process. Tight workspaces, overlapping trades like plumbing and electrical, and on-the-fly design decisions challenge even seasoned professionals. When project management falls short, these complexities multiply into missed deadlines, unexpected costs, and mounting frustration.
In fact, one renovation case showed how a simple miscommunication between contractors spiraled into a three-month delay and a 30% budget overrun. This demonstrates that no matter how luxurious your fixtures or stylish your tiles, poor coordination undercuts every other effort.
Selecting the Right Contractor
Effective project management begins long before demolition day. It starts with hiring the right contractor. Don’t let price alone be your guide; instead, seek out professionals with proven experience in bathroom renovations similar to yours. Checking references and viewing past projects gives you insight not just into quality but into how well they manage schedules and surprises. The smoother their past projects ran, the better your chances of avoiding hidden pitfalls.
When vetting contractors, ask these critical questions:
- How many bathroom remodels have you completed in the past year? Look for contractors who specialize in bathrooms rather than general remodelers. Specialists understand the unique challenges of plumbing, ventilation, and moisture management that bathrooms demand.
- Can you provide references from recent clients with similar project scopes? Contact at least three references and ask specific questions about timeline adherence, budget accuracy, communication quality, and how the contractor handled unexpected issues.
- What is your typical timeline for a project like mine? Compare this against industry standards (3-6 weeks for standard remodels, 8-12 weeks for complex projects). Be wary of contractors who promise unrealistically fast completion, as this often indicates corner-cutting or overcommitment.
- How do you handle unexpected issues or change orders? The best contractors have clear processes for documenting changes, providing cost estimates before proceeding, and obtaining written approval. This prevents the “surprise” invoices that plague poorly managed projects.
- Who will be my primary point of contact throughout the project? Knowing whether you’ll communicate with the owner, a project manager, or rotating crew members helps set expectations for consistency and responsiveness.
- Are you licensed, bonded, and insured? Verify credentials independently through your state’s licensing board. Proper insurance protects you from liability if workers are injured on your property or if work damages your home.
Establishing Clear Communication Channels
Once you have the right team, communication becomes the backbone of success. Think of regular communication like oiling the gears of a complicated machine. Without it, everything grinds to a halt. Weekly check-ins with your contractor help catch small issues early before they escalate.
These meetings are opportunities to confirm progress, clarify any design changes that occur impulsively (which happens often in bathroom remodels), and adjust timelines realistically. When information flows openly between you and everyone involved, you maintain control rather than chasing after problems.
Establish a communication protocol at the project’s start:
- Preferred method of contact: Determine whether phone, email, text, or project management app works best for different types of communication. Quick updates might work via text, while change orders should be documented via email.
- Response time expectations: Agree on reasonable response windows. For example, non-urgent questions within 24 hours, urgent issues within 2-4 hours during business days.
- Scheduled check-in days and times: Weekly meetings (even if brief) keep everyone aligned. Tuesday or Wednesday mid-morning often works well, allowing contractors to assess the week’s progress and address concerns before the weekend.
- Process for approving changes or addressing concerns: Establish that all changes must be documented in writing with cost and timeline impacts clearly stated before work proceeds. This prevents the common scenario where verbal agreements lead to disputes later.
- Documentation requirements for decisions and modifications: Take photos throughout the project, save all email correspondence, and maintain a project binder with contracts, permits, receipts, and warranty information. This documentation proves invaluable if disputes arise or when selling your home.
Leveraging Project Management Tools
Utilizing project management apps such as Trello or Basecamp adds another layer of clarity by consolidating schedules, task lists, documents, and progress updates in one place accessible to all stakeholders. This simple step prevents lost emails, forgotten details, or conflicting versions that often slow remodels down.
These digital tools allow you to:
- Track material orders and delivery dates: Knowing when tile, fixtures, or cabinetry will arrive prevents work stoppages and helps contractors schedule labor efficiently.
- Monitor task completion in real-time: Visual progress boards show what’s done, what’s in progress, and what’s upcoming, making it easy to spot delays before they cascade.
- Store photos documenting progress: Weekly photos create a visual timeline useful for insurance claims, resale documentation, or simply remembering what’s behind finished walls if future repairs are needed.
- Maintain a centralized repository for contracts, permits, and warranties: Digital storage ensures you can access critical documents from anywhere and won’t lose paper copies in the chaos of construction.
- Create accountability through transparent task assignments: When everyone can see who’s responsible for each task and its deadline, accountability increases and finger-pointing decreases.
Professional Expertise Makes the Difference
At Bath Gems, we know firsthand that tight coordination prevents costly missteps. Our team leverages proven project management methods combined with deep renovation expertise to keep your bathroom transformation on time and on budget. If avoiding frustrating delays and surprise expenses sounds good to you, consulting with us may be your smartest first step toward an immaculate bath remodel.
Ultimately, effective project management isn’t just about overseeing tasks. It’s about orchestrating a smooth process where every detail is accounted for so your vision becomes reality without unnecessary headaches or expenses. The difference between a renovation that exceeds expectations and one that becomes a cautionary tale often comes down to how well the project is managed from start to finish.
Avoiding the pitfalls of poor project management is crucial for a successful bathroom remodel. With the right team and clear communication, your renovation can run smoothly, turning potential chaos into a rewarding transformation that you’ll enjoy for years to come.